Thursday, May 21, 2020

INEXPENSIVE PATIO/DECK/BALCONY VEGETABLE PLANTER-Perfect for Cool Crop Radishes, Lettuces, Spinich, Etc.


Add caption

   Cool Weather Crops-Vegetable Planter Patio/Balcony Boxes

Introduction

   Here it is the middle of September and I wanted to set up some "Grow Veges Planter Boxes that will allow me to grow a few Cool Weather Crops just outside my door.  These Radishes are well onto 10 days old and growing vigorously.  Hopefully, the weather is cool enough that the radishes will make nice sized bulbs instead of just grow a lot of Leaves.  I will make a decision in a few more days.  The weather here was still in the lower 90's and I'm afraid to hot to make radish bulbs.  They are just now starting to put out True Leaves.  If they only want to make leaves, then I will try again when the temps drop into the lower 80' or even 70's

   I also plan to at least build another box for lettuce.  And maybe a few for Spinach, Green Onions, and many other things that lack cool winter.  We are in Zone 6.5 to Zone 7.  Depending on Who makes the zone maps for planting times, etc.  Here in South Central Kansas,  We are just going into fall and the temperatures should soon be perfect for growing cool weather crops all the way into November.  Even later if we turn the Boxes into Little Green Houses!  A project I currently have on the Drawing Board!  Stay Tuned.

ALL ABOUT SOIL FOR YOUR BOXES

  In case you are wandering what  I used for Soil,  I use 1 part Vermiculite, 1 part Perlite, 1 part Compost,  to 16 parts of Used Potting Soil.  If you are worried about using Old potting soil,  just spread it out on your driveway on a Sunny day as thin as possible.  Leave in the Sun for 5 or 6 hours and it will be Sterilized by the heat and Ultraviolet Rays of the sun!

   I would not recommend using Top Soil .  It is just to heavy and dense for Box Growing!  I purchased many bags of "Top Soil" from the various Big Box stores for my Garden and find that most just aren't good enough.  Even the more expensive stuff.  Either it is 50 % Clay or it is full of large half composted tree chips that still need a couple years. Potting Soil?  One store sold "Professional Potting Soil"  It was probably fine but when I ran it through a 1/4 inch hail screen to sift out any glass, pebbles etc,  1/3 of the bag came out to be little finger size or larger.   Sticks!   I paid for "Soil"...not Sticks!

LETS GET STARTED!

MATERIALS:  
  1. Three - 6 ft  CEDAR FENCE BOARDS 3/4 X 5.5 X 72 inches. -  New or Old in Good Repair.  Old fence boards must not have any holes and no warps, twists or bows.  You my find the thickness and width to vary slightly but the length is pretty standard. While I'm there, I get some outdoor redwood oil stain.  It will increase the life of your box  tremendously.  An Outdoor Paint of your color choice will be fine too.  One Spray Can used for both inside and outside the box should be easy and fast and enough.  My Total New Wood Cost was just short of $15.  Of course Used Fence boards can be Free!

  2. Small Box COATED WOOD SCREWS -  #6- 1 - 1/2 inch length.  I use "All Purpose" or Dry Wall Screws - Usually Black Philips Slot Screws. 
  3. Waterproof Wood Glue.  I use Tite-Bond #3.
  4. 1/4 inch Drill Bit and Wood Drill.
  5. Good Outdoor Wood Stain or Paint.  One Spray Can will usually do.  Brush Paint will cost the same or More!
Later - May 21, 2020:

Do to health problems, I had to figure out a better way to garden other than getting down and dirty in a regular garden.  My daughter helped me to set up a Patio, Box and Bucket Garden . Here you see chives growing (6th year on the balcony railing - my first Experimental Box.  As you can see, it is a little worse for ware, but it still works.
                                                        A little about Composting around your plants

This year.  I added a little Beaded  fertilizer to the Chive Box.  The soil was getting low also.  So I just topped it off with a little Compost.  "Cotton Boll" by Boca Brand that you can find at better Plant Nurseries.

  About that.  When I opened the sack, it was very warm in there!  The Compost was still Composting.  Too much of this added in this state will rob your plants of Nitrogen which is  used in the composting process.  I found that in a garden bed, fresh like this, it can slow production of your plants down in a raised bed.  But the Same Bed - Next Year will have your plants Flourishing because the over wintered compost is Giving Back it's Nitrogen big time the second year.

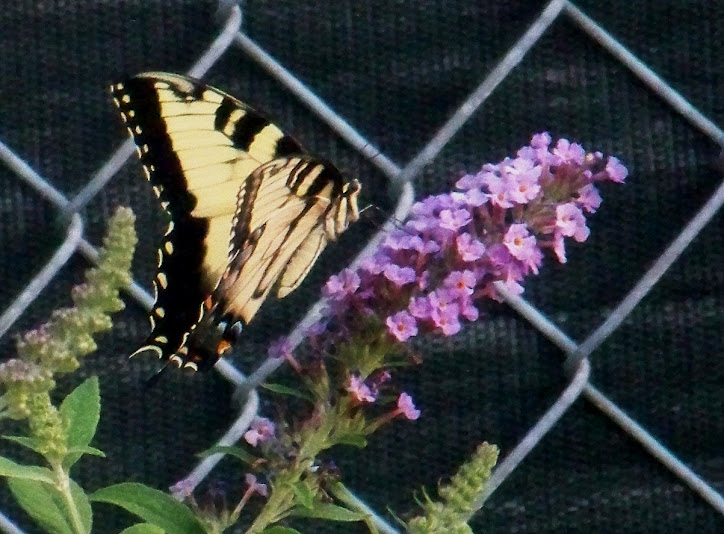
 Where it really comes in handy is in the fall when you have plants that are in the ground that have gone dormant for the winter.  I raise what I call "Monarch Butterfly Wild Flowers for the Monarchs.  A Brilliant wild red-orange wild flower that looks georgous in a large pot. My 18 inch pot has a mature plant that is in its 6 year. And has added an extra stem.  They are slow to spread by the roots.  I am hoping it will have seed pods this year as I am anxious in starting my own strain from the seeds.  Anyway. When winter comes, the plant disappears completely.  About 3 to 4 inches down in an enormous flower pot.  I then cover it with 4 inches of  Cotton Boll compost and it comes through the winter in flying colors.

 This year I built two boxes for my Garlics and 2 boxes for Radishes.  The first picture is the early planting of radishes and the second box is a Replant because the seeds got hit by a "Gully Washer " rain as they called it when I grew up on the Farm.  The survivers are mature but the center  of the box where I replanted is just catching up.

  I built a second box that I just finished planting.  You can put from 80 to 100 seeds in a box.  Seeds planted in a box (because you have hands-on control) can be planted much closer than in a garden.  Usually the seed package shows the depth seeds should be planted, distance apart in a row, and distance between rows.

 Most people don't realize the row distances from each other are usually stated for Machinery Use!  You will probably be working with a small trowel or hand implement to cultivate in your boxes. No reason for wide paths between rows. 

  As you may have noticed, you will see several small radish plants in a neat row down the middle of the 2nd Radish Box.  These are Transplants from the first box.  If I have to thin extra plants, why not poke them in where there is new room.  I planted the rest of the box with a variety of radishes yesterday.  We plant a variety just to test them out.  Our Favorite Radish is the 2 inch X 1 inch "French Breakfast" radish.  They are almost twice as long as the ordinary ball radish.  And Very tasty!

  You can plant radishes 1 to 2 inches apart and the same Across from each other in the next row!  Usually you can plant 2 to 3 X as many as in the same row length as in a regular garden.  Green Onions (Scallons) can be planted the same way in the Boxes.  Or lettuce before it gets hot.  However,  you should water about every other day because Boxes and Pots loose water faster than the ground.

 We seem to have a very moody spring this year.  To many cool and cloudy days.  Plants need damp warm soil and plenty of spring sunshine to take off!  This is my first year with large patio garden boxes and 5 gallon buckets for the Tomato Plants.  So far I am happy with the results but Please God, give us more Sunshine and warm spring days!  I also planted a Cucumber Plant with each Tomato Bucket plus starting them in buckets by themselves.  I have 4 tomato plants (Roma) for canning and 6 or 8 picklers.  

Tomato Plants in 5 Gallon Buckets

I was only able to plant 4 tomato plants locally- due to the shut-down.  So I am going to try to Clone at least 2 or 3 more plants.  Hopefully, if they take, I will still have time to grow them before the season is over.  I will probably be making these cuttings in the next day or two.  I am trying the 2 liter Bottle method of getting them to root.  Maybe I can show the results in the next Post.  Stay tuned.  I'll be here God Willing and the Creeks don't Rise!  Thanks for stopping by.  

 My Two Garlic Boxes to be Harvested in mid June
as needed!
 Same Radish box as above after the wash out a few weeks ago


 Our Bucket Garden for Tomatoes and Cucumbers


 Two Tomato Plants with Stakes and T-Shirt Strip ties.


 Shaders protecting the new Cucumber Plants from the Harsh Sun until
they can set in and handle the direct sun.  My own invention.  And they Work!  Copyrighted Robert Mader 2020.  
You have permission to make for yourself,  Commercial use to Sell Not given -  Inquire if interested.


 Always provide at least a 6 foot Stake
to tie Tomato Plants to. Indeterminate
varieties can grow up to 15 Ft or more!


 Cutting of a Celery Root from Kitchen Waste


 The Beginning of my First Patio Garden


 My 1st 6 year old Patio Box with Chives


Varieties of Radish Seeds this year.  Note the Special
 Watermelon Radish that come from Hawaii.  They are 
about the size of Baseballs and are very sweet it says.


https://beginninggardeners.blogspot.com/b/post-preview?token=APq4FmBkj_KRLJecY9WiX7gDHU44g3UKtrb7jzeadcd8gKhfZP73vnq8HmHe2s0mhDqWKSEizUNMzi-D3u32j1BcOm2ComZg85YqDmHJMAiIpUyrfGqgnpshmD1knvcP0ysl8ueBpY_F&postId=2443403272796374600&type=POST

Sunday, May 30, 2010

How To Fight Tomato Blight Before it Starts!


HOW TO FIGHT TOMATO BLIGHT BEFORE IT STARTS!


Note: This article was previously published in
GrandBobsGarden.Blogspot.Com May 30,2010

Actually, there is no real way to avoid Tomato Blight completely. The spores live in the soil from year to year and when the conditions are right (as they were last year all over the US) nothing can completely stop it.


Last year we had a lot of moisture and cool weather that made conditions perfect for Tomato Blight. We were actually hit with the same blight that  hit Ireland in the 1840's and caused the Great Potato Famine when whole families starved to death from the effects.

Here it was called the Late Tomato Blight. Many people do not know that Tomato Plants and Potato Plants are related. Another asside: Tobacco and Tomato plants are also related. Tomato plants can catch Tobacco Mosaic. A word to the wise; smoking around tomato plants can transmit Tobacco Mozaic to Tomato Plants. Don't do it.

However, there are a few steps you can take that will definitely help  in more normal  weather conditons when planting and careing for Tomato Plants:

  • Mulch Your Tomato Plants.  


    • Keep a barrier between the leaves of your tomato plants and the ground. A good rain or just your sprinkling can cause the Blight Spores to be splashed up into the lower leaves of the plant. The blight when started, travels up from the bottom of the Tomato plants lower leaves quickly into the upper areas. Most people use Wheat Straw. I used shredded office paper and newspaper to good effect last year although I think wheat straw would have been better. (I refused to pay $6 for a $2 bale of Straw!
  • Keep Your Tomato Plants Dry.  When you water. Water on the Ground at the base of the plant. Don't sprinkle if you can help it. Soaker hoses are perfect for this or just run water from the hose laying on the ground. Spraying the plant - incourages the blight spores - to be splashed up on the bottom of the plant where it can easily take hold in the cool shade and moist limbs and leaves.
  • Space Your Plants Generously. Plants that are planted on top of each other, encourage lots of shade and moisture near the bottom areas close to the ground. Blight Spores thrive on these conditions. A Bare minimum would be 3 feet. 4 to 5 feet would be better! 
  • Stake or Trellis Your Plants. Staking each plant or using a trellis or wire cage prevents the branches from sagging over to touch the ground. I have a short article on this blog explaing how to make great Tomato Stakes from Cedar Fence board. I will be using them extensively this year after testing out their utility for a few years. A Cedar Fence Board will cost you about $3.50 or less and you can rip out about 8 - 6 foot stakes. This year I will stain them Red Wood color instead of Green like last year. Easier to see in the plant foliage for tying up the plants as they grow big.
Trim Plants at the Bottom at least 12 Inches. Low hanging limbs that are close to the ground can easily pick-up and transmit Blight Spores upward to the plant. From the very first  keep lower leaves trimmed off.

Cheers!
Bob
GrandBob
Copyright Robert Mader 2010
All Rights Reserved

GrandBobsGarden.Blogspot.Com

Friday, March 12, 2010

Start Potatoes Soon For a Good Crop

Start Potatoes Soon For a Good Crop


Soon it will be time to plant potatoes in the South Central Kansas – and all zone 6 areas. Now is the time to go to your local nursery and pick out some good “Seed Potatoes”. Planting time is only a week or 2 away!

How Many Seed Potatoes Should I Buy?
The going rate for seed potatoes here in Wichita, Kansas is about 89 Cents a pound. I would suggest at least 3 lbs. If this is your first time planting potatoes. This will give you around 30 plants after cutting the “Chits” - 1 to 2 inch sections of potatoes with 1 or 2 “eyes” each.
Preparing the Potatoes Before You Plant
Cut each potatoes into chunks (chits) each with at least one or two eyes a piece. This should be done 3 or 4 days before you plant. This allows for the potato cuts to skin over and gives the pieces resistance to rot in the ground. A good “chit” should have eyes at least ½ inch to 1 inch long. To encourage eye growth, you may have the potatoes sit in a dark place in a paper sack for a week or two while they grow good eyes. This can be done before or after you cut the chits.
How to Plant
The traditional way to plant potatoes is to make a furrow about 4 to 6 inches deep. Lay in one potato – eyes looking at you – every foot. Rows should be about 18 to 24 inches apart for easy weeding and room for the roots to grow. Cover each “Chit” with about 2 inches of soil. Water them in with about the equivalent of an inch of rain.  As the plants grow, build up more soil around the stem. Keep pulling more soil around the stem as the plants grow, leaving about 4 to 6  inches below the branches at all times or half the stem. New potatoes will form around the covered over stem as it grows and increase your yield – so I have heard. I have never seen much difference. One may also pile straw or compost around the stem.
When to Plant
Potatoes like to grow in cool weather. In South Central Kansas, this is somewhere between early Spring. Traditionally, that is around St Patricks Day, or March 17. Or after the soil has begun to thaw and is workable. We are talking about USDA Zone #6. If you live further North, wait a few weeks. If you live more in the South, You may be able to start near the first of March. In parts of California or Florida, you might even wait until fall to plant your potatoes to avoid the heat.

How Much Sun Do I Need
While potatoes do not grow well in the heat of Summer, they Do need lots of sun. At least 8 hours a day or more. Watch out for those big shade trees.
When to Harvest Potatoes
Early Baby Potatoes:
For those delicious baby potatoes, as soon as you see flowers on the potatoes, you should be able to gather these. Gently reach into the loose soil around the roots and pull a few out. Recover the roots.
Mature Potatoes: Potatoes are finished when the tops start falling over in the Fall. No more growth will occur. You may feel confident about digging up and harvesting them at this time. However, you can leave them in the ground for a few weeks if you like as long as the soil is not wet or too damp. You could harvest each plant and allow the potatoes lay exposed for a few days to dry before you store them away in a cool dry airy place for Winter Storage.
If possible, use a Garden Fork. Dig down about a foot out from the center of the plant to avoid stabbing the potatoes. If you just pull the plants up,  you risk leaving half the harvest underground!
A plot 6 foot wide and about 10 foot long will hold about 30 plants. Set a plant every foot or so in rows about 2 foot apart.
Figuring that the average number is 6 potatoes per plant, you could harvest around 180  or more full-sized  potatoes by the end of the season. Around July for potatoes. In about the same space as your car takes up in the garage. Not bad at all!  About 2- 10 1b bags at the super market. Or 10 Kilograms.
Your Soil Should be Light
Potatoes should be planted in a light sandy soil. If you can test it, the soil should be about 5.5 to 6 pH. Or a little towards the acid side. If your soil is on the clay side – dries out to the texture of a sidewalk, add lots of rotted leaves (leaf mold) or other mature compost to lighten it up so the tubers can grow.
Should I Fertilize?
Do not over fertilize if your soil is already fairly fertile. A little composted cow manure in the planting hole is probably OK. To much nitrogen, and your potatoes grow Tons of beautiful leaves – and no potatoes. Much like Tomatoes do! If your soil is fairly heavy, mix in some pine needles from under the tree in the back yard. They will help lighten the soil and add a little acid while they are at it. Potatoes like Potassium and Potash. The cow manure can provide some of that. A small handful of Wood Ashes will provide organic Potash. Beware of too much Nitrogen. You could raise a beautiful crop of leaves – and little or no potatoes.
How Much Water?
Potatoes need about an Inch of Rain a week. Water accordingly. However, too much water will cause potato rot etc. Just keep them moist throughout the growing season.
____________________________________________________________________________________________________________________
Container Grown Potatoes
Some of these methods are perfect if you are an Apartment Dweller and don’t seem to have room for growing plants. All you need is a few feet or less of space on a Patio, Balcony overlook or even in a Big Flower Pot on your front steps. Or put them in the flower bed and tell the landlord they are flowers! If you have a tiny area to put a pot or container, good sun during the morning and cooling shade in the afternoon; your good to go. However, keep a few feet away from hot sun-bathed walls to avoid cooking your plants! All you need then is a pitcher to add water once a day and 5 minutes time after work to tend to your plants.


Stack Old Tires
I have never tried growing potatoes in a container but I plan to try a few systems this year. Some people stack old car tires up and fill them full of soil. You could probably plant 4 or 5 potatoes in such a stack. However, Hot Tires in the Sun – especially when they are not to old – can give of toxic fumes. This cannot be good for the potatoes – or you!
I don’t recommend this method. At least use old tires if you want to try this to reduce the risk.
Build a Board Box
Put 4 – 2 x 2 X 3 ft stakes in a square. 2 foot to a side. Nail or Better, Screw 2 by 6 X 2FT Cedar or Redwood Boards at the bottom. Put the soil mixture in and gradually add boards up the sides as the plants grow. When the plants flower, you might unscrew the bottom boards and reach in to harvest “New (baby) potatoes early on in the season. Remove all the sideboards to harvest in the fall. Do not use Treated Lumber because of the toxic nature of these products. This is why Cedar and Redwood is superior for this method. Pine will only last one season or two. The others can be used for years. Especially Redwood.
Potato Sacks
These sacks for growing potatoes only require that you add soil and set anywhere there is good light and not to how. However, the prices (I feel) are outrageous. Instead, I am buying “Green” grocery sacks from the grocery stores and the Big Box Stores. I will put soil in them and try this method out. I got mine from WalMart for $1.00 each. What ever you use, be sure it drains well or your potatoes will rot. I am also going to try large Plastic Carry bags that come free and punch a few pencil sized holes in the bottom for drainage. These might work well set in old tires for support and reduce the risk of toxic gases from them when they sit in the hot sun. Also the tires will hold the bags upright.
Trash Cans/Plastic Tubs
This sounds like a pretty good idea, although I would go for old steel cans maybe with rusted bottoms. Seems like a good use for them. If they don’t have holes, put several in the bottom. You can do this easily and quickly with a portable drill. Just turn the Plastic Tub or Can upside down and using a ¼ inch bit, drill several holes from the center out to the edge of the bottom.

Compost/haystack Method
I have never tried this method but I understand it is not conducive to growing well if you have rodents around! Otherwise I hear it works fairly well and is an easy and quick way to grow potatoes. Just scatter the potato “Chits” (eyes up) about a foot apart on top of loose soil. Throw compost or straw over them. Water well. As the plants grow up through the straw or compost, add more until they bloom. To harvest pull the straw back and pick the potatoes.
Raised Beds
This is my personal favorite. Using old 2 x 6 (or wider) lumber and 4 – 2 x 2 stakes for corners. Cut one 8 or 10 ft length of lumber in half to make 2 – 4 or 5 foot ends. Nail to 2 – end stakes. To finish up, nail two side boards (8 or 10 ft) to the end stakes for sides of the Raised Bed. Your done. Add a good soil/compost mix and put your potatoes in .
4FT X 4FT Beds are also convenient. You can put 6 or 8 plants in one of these and like the long beds, and have complete control of the conditions in which you grow your plants. That’s why I favor these beds.
Again, Cedar or Redwood is resistant to rot and will give you several years (up to 20 for Redwood and 5 or 10 for Cedar) of good use.
A Special Note
Always keep growing potatoes covered to avoid exposure to sunlight. Exposure to sunlight will cause them to turn a greenish color on the skins. Another reason for heaping soil or compost around the main stem of the plant as it grows. This greenish coloring is actually a poisonous substance called Solanine. If you see this on a potato, just cut it away along with the eyes of a potato before you cook them. 
Growing Potatoes can be fun and you can’t beat the flavor or “new” or baby potatoes 1 or 2 inches around. Why not try it This year!
Cheers!
GrandBob
This article is fully protected by Copyright and should not be reproduced by mechanical printing or electronically duplicated without the author’s permission.
Copyright 2010 Robert Mader


Thursday, February 25, 2010

HOW TO PLANT STRAWBERRIES

Hi Folks!

Thinking about planting strawberries this year? Me too! Jonnsons Garden Center here in Wichita just sent me their monthly newsletter - on real paper (no e-mail for them). They're saying to  Plant Strawberries around the Middle of March in our South Central Kansas Area. We're in the USDA Plant Hardiness Zone 6b. That means you have about 2 or 3 weeks before planting time Here - and a little more time if you live in one of the colder zones. Usually strawberries go fast at the nurseries so don't dilly dally if you want to get Strawberries in this year.


It's been years since I've planted home grown strawberries. I remember when my mother asked me to dig up the ground on the side of our garage on our Western Kansas farm, so we could plant a decent sized patch of "Everbearing" Strawberries. Complements of  Henry Fields and the mailman who had dropped off at our box down the road apiece.


Did I get out a garden spade or fork from Dad's collection of digging tools kept in the back west corner of the garage? Nope. Even as a 15 year old, I knew I would need something a little more heavy duty. I grabbed a "sharp shooter" and Dad's Pick-Ax. One to crack open the hard pan and the other to jump-up on... to cut through a few inches of badly compacted soil.


My big brother sometimes parked Dad's International tractor here just long enough to catch noon "dinner" as we called it out in Western Kansas and a nap on the living room couch before going back out to the field until evening time. 


After my brother left home, I usually got the job of occassional field work but so help me, I never could make a straight furrow! I just didn't have the nack for it as hard as I tried.  Dad just loaned me out for hire to the neighbors - when they were desperate for a dependable field hand. I was dependable. I just wasn't very good!  


But, I did managed to do well enough to buy my first car at 16. Would you believe "on Lay-A Way! A wonderful 1953 Oldsmobile Rocket. How I loved that big green Tank! I was told It originally was a race car. Big engine - 4 barrel carborator- White side walls. Done 95 in a quarter. We had a favorite Highway hill just North of town to test our cars on. Very dangerous at the bottom. But we did it anyway. We weren't perfect Then either! 


Anyway, I got the Strawberries planted in Mom's little plot. They grew pretty well too - even if my Dad had  (on occassion) used the area to set-up a portable cement mixer along side a pile of course sand and several sacks of powdery gray cement. And splashed a little around on the ground sometimes. My Dad did  all his own remodeling with some help from neighboring farmers and friends.


I was just 6 when my  Dad bought some land with an old gray two-story house - once owned by a retired Bootlegger who shall remain unnamed.


My Dad and the neighbors completely remodeled the old house,  outside and in. Lowered the roof. Put on new shingles, new chimney, Stucco, windows, and dug a basement (for Tornadoes you understand. 


He done everything himself - except for the electrical. Right down to sanding the old wood living room floor where a ring of cigarette burns marked "gambling ring where the old bootlegger and his friends played "Craps" every Saturday night, casually stumping out their cigars and cigarettes. I guess ashtrays were scarce or he never had enough to go around for his Saturday night "friends".


Long afterwards, we kids would find old dried out fruit jars  buried in the side of the creek bed and hidden in mud-filled old rusted car hulls  setting along the creek bed. I think my Mother insisted Dad should move the house up on the Other side of the hill where the land was pristine and not littered with vintage whiskey bottles and fruit jars - once used for the same purpose. 


Which he did. So that brings us back to the strawberry bed... Would you believe... I like a good story...and I just had to pass it on to you good folks!
The soil should be well drained, fertile and lightened with compost etc.


Strawberries like "Sandy Soil". It provides good drainage. It's also good to mix in a little dried manure and compost or leaf mold to lighten up the soil.


I wouldn't recommend the stones and ocasionally large pebbles  along with the cement dust that got strewn around - during the previous remodeling work in my mothers Strawberry Bed. It sure made for hard digging!


However, the strawberry bed well drained!


Strawberries also like lots of water. At least the equivalent of 2 or 3 inches of rain a week. It didn't rain much then - and it still doesn't. We lived about 80 miles east of the Colorado desert! I carried several milk buckets of water to them every day - until Dad decided to get "Up Town" and buy a rubber hose! It wasn't that my Dad was that frugal, he just hadn't seen the need before. If your wheat fields don't get rainwater, your just out of luck! Garden hoses were not to practical for a western Kansas farmer because their Wheat fields, Corn and Sorgam crops were their garden!  


I'm not sure how we prepared the strawberry bed for winter or even if we did, but one of the best ways to do it is to pile about a foot or two of wheat straw over them in the late fall. Then carefully pull the straw away from each plant in the spring. Otherwise, they will probably all freeze out when it gets 5 or 10 below next winter. Or even colder in North West Kansas where I grew up! It wasn't called "Little Siberia" for nothing!


Watering and Planting Strawberries


Pick a cloudy day if you can to put in your new plants, to prevent withering of the plants from the hot sun. "Water in" your plants right after planting them.


From then on, "soaker hoses are good for gentle, deep watering - and save you money in the long run. Your strawberry bed should be deep watered at least once a week.  Never let them dry out. But be careful. Frequent standing water will cause the plants to rot. Best time to water? Early morning which gives the plants time to dry off before evening. Otherwise they can succumb to Mildew and Fungus'.


Mulch your strawberries plants with Straw or Pine Needles. If you have a pine tree in the front yard, you have plenty of those! Strawberries as well as most acid living garden vegetables, like the acid pine needles produce in the soil. Mulches such as these keeps the soil cool, keeps moisture in and and protect the berries from picking up dirt and mud.   


After the last harvest, cover the plants over (before the first frost in the Fall) to protect them from freezing out in the deep of Winter. The colder your area, the deeper the mulch should be. It might be from a few inches to a foot or two in the far Northern areas of the US.
I Repeat
Remember, Mulching is essential for strawberry plants because it keeps the soil cool, controls weeds, retains moisture and keeps the strawberries from laying on the bare soil and rotting. And keeps them from freezing out in the Winter. If you want a Good crop of Strawberries - ya' gotta' mulch!


Place the mulch in the rows between the plants when you plant them.  I don't like Wood Chips because they sometimes support a crop of Toad Stools, especially in the Spring. And they take forever to break down - as do dry uncomposted leaves. The mulch should be removed from the plants in the spring. Just gently pull it back from the strawberry plants back onto the rows between.


Cloning Strawberries


To make new "starts" to enlarge the bed, or give to friends and neighbors, get several 6 -inch lengths of clothes hanger wire or such, and make a hairpin shape out of them. Pin down a runner in several places in the soil (about every 6 to 8 inches). Pile a little soil on top of the pinned area. Keep watered. The best time to do this is in the spring or fall.


In a few weeks you will be able to cut the rooted sections apart with no harm to the "mother" plant. You have just produced a "clone" - without the laboratory!


It is my understanding that a similar process is done to reproduce Hybrid and Open Pollinated Tomatoes, over and over, every year. I was amazed when I first learned this. Tomato "cuttings" are made from the Parent plant and rooted in a light soil mix. In a kind of  "Topiary" or Bell Jar environment.


 I suppose a ceramic pot or an old fruit jar would work just as well if you kept the cuttings damp with daily misting and gave them  fresh air for an hour or so a day. When you lightly tug on them amd feel resistance, they probably have new roots. Keep them near a well lighted window but never in the direct sun.  When roots appear, repot or plant in your new strawberry plot.


Three Types of Strawberries


June Berries - Bear heavy in June for 2 or 3 weeks


Everbearing - Pick in June and throughout the summer until they stop bearing.


Day-Neutral - Same as Everbearing


So, better hurry down to your local nursery to get some of those Strawberry sets if your in South Central Kansas. A little later if your further North, Strawberries should be planted just after the last hard freeze in the spring. Late April is usually OK. Late May or June is  a little late. Strawberries do not love Hot weather.  Expect the first year to have sparce production. That's just the nature of Strawberries!  The second year will be a good producing year for you if they have been well cared for the year before. 


Support Your Local Nursery

Here in the Wichita area, I like Dutches on South Seneca. They are close to me and they're nice people too! I keep asking them when they are going to have a sale on their plants. I'm so cheap! They see me coming. I keep trying. They always tell me "Never" - because they always have great prices on their stuff.  And they Do! They always have a Big Selection of healthy plants and Tons of garden accessories, soil supplements and even cute little garden designs for the ladies! I find their people very knowledgable.


So check out your local plant nursery. Chances are their prices are just as good as the Big Box store. And you can't beat the quality and service! And the Knowledge! 


Warning! Big Box stores will set their plants out very early. That does not mean you should plant them when you buy them. At least in the first of the season. You plants may either die from the cold or be stunted and wont show any growth for weeks.  Actually, planting too early without proper protection from the cold can  set back some plants for  several weeks! This is especially true for warm weather plants such as Tomatoes and Peppers.


So visit your local Plant Nursery. You'll be glad you did!


Tell 'em GrandBob sent you.


Bob
GrandBob


http://grandbobsgarden.blogspot.com/
http://beginninggardeners.blogspot.com/
http://groups.Yahoo.com/Group/HaysvilleFarmandGardenNews